1. 서론
- 스프링 시큐리티 공부하던 도중 간단하게 권한 부여하는 방법을 예제로 구현해보고자 포스팅하게 되었습니다.
- 이 포스팅을 잘 보게 될 경우 간단한 권한관리를 알 수 있게 됩니다.
2. 본론
- 먼저, 간단하게 컨트롤러 구성부터 해보겠습니다.
package com.example.springsecurity.controller;

import lombok.extern.slf4j.Slf4j;
import org.springframework.stereotype.Controller;
import org.springframework.ui.Model;
import org.springframework.web.bind.annotation.GetMapping;
import org.springframework.web.bind.annotation.RequestMapping;

@Controller
@Slf4j
public class HomeController {

    @GetMapping("/")
    public String home(Model model){
        log.info("home controller");
        return "home";
    }
    @GetMapping("/user")
    public String dispUser(Model model){
        log.info("home controller");
        return "/user/user";
    }
    @GetMapping("/manager")
    public String dispManager(Model model){
        log.info("home controller");
        return "/user/manager";
    }
    @GetMapping("/admin")
    public String dispAdmin(Model model){
        log.info("home controller");
        return "/user/admin";
    }
}
- 각각의 컨트롤러는 해당 html에 매핑되어 권한별로 표시해줄 수 있게 됩니다.
- home.html
<!DOCTYPE html>
<html xmlns="http://www.w3.org/1999/xhtml"
xmlns:th="https://www.thymeleaf.org"
xmlns:sec="https://www.thymeleaf.org/thymeleaf-extras-springsecurity5"
xmlns:xsi="http://www.w3.org/2001/XMLSchema-instance"
xsi:schemaLocation="https://www.thymeleaf.org/thymeleaf-extras-springsecurity5 ">
<head>
<title>Spring Security Example</title>
</head>
<body>
<h1>Welcome!</h1>
<p>Click <a th:href="@{/user}">user</a> to see a greeting.</p>
<p>Click <a th:href="@{/manager}">manager</a> to see a greeting.</p>
<p>Click <a th:href="@{/admin}">admin</a> to see a greeting.</p>
</body>
</html>유저페이지
<!DOCTYPE html>
<html lang="en">
<head>
    <meta charset="UTF-8">
    <title>Title</title>
</head>
<body>
    <h1>유저페이지</h1>
</body>
</html>
매니저 페이지
<!DOCTYPE html>
<html lang="en">
<head>
    <meta charset="UTF-8">
    <title>Title</title>
</head>
<body>
    <h1>매니저페이지</h1>
</body>
</html>
어드민 페이지
<!DOCTYPE html>
<html lang="en">
<head>
    <meta charset="UTF-8">
    <title>Title</title>
</head>
<body>
    <h1>어드민페이지</h1>
</body>
</html>
- 시큐리티 환경 구성하기
package com.example.springsecurity.security;

import lombok.extern.slf4j.Slf4j;
import org.springframework.context.annotation.Bean;
import org.springframework.context.annotation.Configuration;
import org.springframework.security.config.annotation.authentication.builders.AuthenticationManagerBuilder;
import org.springframework.security.config.annotation.web.builders.HttpSecurity;
import org.springframework.security.config.annotation.web.configuration.EnableWebSecurity;
import org.springframework.security.config.annotation.web.configuration.WebSecurityConfigurerAdapter;
import org.springframework.security.crypto.bcrypt.BCryptPasswordEncoder;
import org.springframework.security.crypto.password.PasswordEncoder;

@Configuration
@EnableWebSecurity  // 이거 안해줘서 그동안 계속 안됬었음
@Slf4j
public class SecurityConfig extends WebSecurityConfigurerAdapter {

    @Override
    public void configure(AuthenticationManagerBuilder auth) throws Exception {

        String password = passwordEncoder().encode("1111");

        auth.inMemoryAuthentication().withUser("user").password(password).roles("USER");
        auth.inMemoryAuthentication().withUser("manager").password(password).roles("MANAGER");
        auth.inMemoryAuthentication().withUser("admin").password(password).roles("ADMIN");
    }

    @Bean
    // BCryptPasswordEncoder는 Spring Security에서 제공하는 비밀번호 암호화 객체입니다.
    // Service에서 비밀번호를 암호화할 수 있도록 Bean으로 등록합니다.
    public PasswordEncoder passwordEncoder() {
        return new BCryptPasswordEncoder();
    }

    @Override
    protected void configure(HttpSecurity http) throws Exception {
        http
                .authorizeRequests()
                .antMatchers("/").permitAll()
                .antMatchers("/user").hasRole("USER")
                .antMatchers("/manager").hasRole("MANAGER")
                .antMatchers("/admin").hasRole("ADMIN")
                .anyRequest().authenticated()
            .and()
                .formLogin();
    }


}
- @Configuration, @EnableWebSecurity 어노테이션을 추가해줘서 이게 시큐리티 설정을 해주는 클래스다~라는 것을 알려주는 것 같습니다.
- AuthenticationManagerBuilder 객체 오버 라이딩은 가상의 계정을 만들어 주는 설정입니다.
- password는 passwordEncoder()에 의해 인코딩 되고, 비밀번호는 간단하게 '1111' string으로 설정하였습니다.
- 그 후 각각의 계정을 생성하고, 권한을 부여해주었습니다.
- Bean을 주입한 PasswordEncoder는 BCryptPasswordEncoder라는 스프링 시큐리티 자체 인코딩을 이용하여 암호화해줍니다.
- HttpSecurity 객체 오버 라이딩은 시큐리티 설정의 핵심 부분으로, 각각의 권한에. antMatchers("controller mapping url명"). permitAll()이나, hasRole("권한명")으로 연결되어있습니다.
- .anyRequest(). authenticated()는 이것을 제외한 모든 url 연결에는 인증이 사용됩니다.
- .and() 로 묶어주었고, .formLogin() 을 사용하여 스프링 시큐리티에서 제공하는 기본 form Login 형태를 이용하도록 해주었습니다.
3. 결과
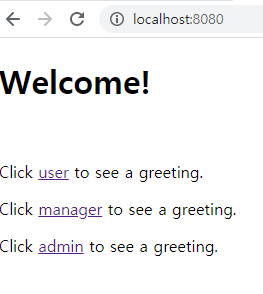
home.html입니다. 잘 나오네요
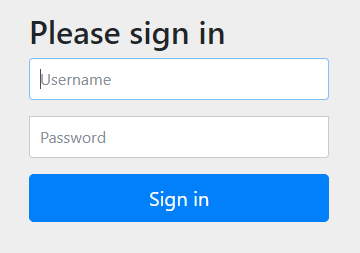
어떤 것을 눌러도 인증하기 위한 로그인 폼이 뜨는 것을 확인할 수 있습니다.
user, 1111로 로그인을 해보면
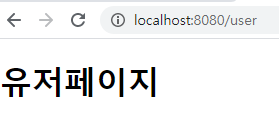
유저 페이지는 잘 들어와 졌지만
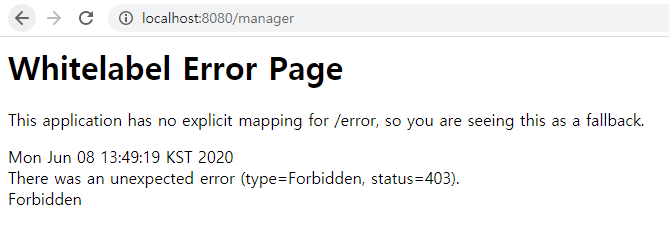
manager 페이지에서는 403 에러가 발생한 것을 볼 수 있습니다.
- manager, admin에서도 각각의 페이지는 잘 접속이 되지만 다른 권한을 가지고 있는 경우 접속이 안 되는 것을 확인할 수 있습니다!
** 참고사항으로, 다른 admin, manager로 권한 차별성을 실험해보고 싶으실 때, /logout을 url에 직접 입력하여 기존 user를 logout 시켜주어야 합니다! **
4. 마무리
- 이상으로 각 권한별 접근 가능 페이지를 나누어보는 간단한 예제를 구성해보았습니다.
'Dev > SpringBoot' 카테고리의 다른 글
| 7. [springboot] Spring Security 간단 권한관리 예제 - UserDetailsService 방식 (1) | 2020.06.09 |
|---|---|
| 6. [springboot] Spring boot 기초 회원가입 예제 (5) | 2020.06.09 |
| 4. [springboot] hibernate.hbm2ddl.auto 속성 정리 (0) | 2020.03.26 |
| 3. [Springboot] Hello JPA! - JPA 시작하기 (1) | 2020.03.26 |
| 2. [Springboot] JPA(Java Persistence API) 정리 (0) | 2020.01.21 |