1. 서론
- 오늘은 스프링 시큐리티에서 제공해주는 form방식 로그인이 아닌, 내 손으로 직접 꾸미는 로그인을 만들어보도록 하겠습니다.
- 이 글을 이해하면, 커스텀 로그인 화면을 구성할 수 있게 됩니다.
2. 본론

- 지금까지는 로그인 과정을 수행할 때, 스프링 시큐리티에서 제공하는 form을 이용하여 로그인을 수행하였습니다.
- 하지만, 이제는 직접 커스터 마이 징하여 로그인 화면을 만들어 보도록 하겠습니다.
SecurityConfig.java
- 먼저 구현해주어야 할 것은 보안 환경설정입니다.
package com.example.springsecurity.security;

import lombok.AllArgsConstructor;
import lombok.extern.slf4j.Slf4j;
import org.springframework.boot.autoconfigure.security.servlet.PathRequest;
import org.springframework.context.annotation.Bean;
import org.springframework.context.annotation.Configuration;
import org.springframework.security.authentication.AuthenticationProvider;
import org.springframework.security.config.annotation.authentication.builders.AuthenticationManagerBuilder;
import org.springframework.security.config.annotation.web.builders.HttpSecurity;
import org.springframework.security.config.annotation.web.builders.WebSecurity;
import org.springframework.security.config.annotation.web.configuration.EnableWebSecurity;
import org.springframework.security.config.annotation.web.configuration.WebSecurityConfigurerAdapter;
import org.springframework.security.core.userdetails.UserDetailsService;
import org.springframework.security.crypto.bcrypt.BCryptPasswordEncoder;
import org.springframework.security.crypto.password.PasswordEncoder;

@Configuration
@EnableWebSecurity
@Slf4j
@AllArgsConstructor
public class SecurityConfig extends WebSecurityConfigurerAdapter {

    private final UserDetailsService userDetailsService;
    @Override
    public void configure(AuthenticationManagerBuilder auth) throws Exception {

//        String password = passwordEncoder().encode("1111");
//
//        auth.inMemoryAuthentication().withUser("user").password(password).roles("USER");
//        auth.inMemoryAuthentication().withUser("manager").password(password).roles("MANAGER");
//        auth.inMemoryAuthentication().withUser("admin").password(password).roles("ADMIN");
//        auth.userDetailsService(userDetailsService);
        auth.authenticationProvider(authenticationProvider());
    }

    @Bean
    public AuthenticationProvider authenticationProvider() {
        return new CustomAuthenticationProvider();
    }

    @Override
    // js, css, image 설정은 보안 설정의 영향 밖에 있도록 만들어주는 설정.
    public void configure(WebSecurity web) throws Exception {
        web.ignoring().requestMatchers(PathRequest.toStaticResources().atCommonLocations());
    }

    @Bean
    // BCryptPasswordEncoder는 Spring Security에서 제공하는 비밀번호 암호화 객체입니다.
    // Service에서 비밀번호를 암호화할 수 있도록 Bean으로 등록합니다.
    public PasswordEncoder passwordEncoder() {
        return new BCryptPasswordEncoder();
    }

    @Override
    protected void configure(HttpSecurity http) throws Exception {
        http
                .authorizeRequests()
                .antMatchers("/","/loginUser").permitAll()
                .antMatchers("/user").hasRole("USER")
                .antMatchers("/manager").hasRole("MANAGER")
                .antMatchers("/admin").hasRole("ADMIN")
                .anyRequest().authenticated()
            .and()
                .formLogin()
                .loginPage("/login")                    // controller mapping
                .loginProcessingUrl("/login_proc")      // th:action="@{/login_proc}"
                .defaultSuccessUrl("/")
                .permitAll();
    }


}
- 이번 포스팅에서 주의깊게 보아야 하는 부분은
    @Override
    protected void configure(HttpSecurity http) throws Exception {
        http
                .authorizeRequests()
                .antMatchers("/","/loginUser").permitAll()
                .antMatchers("/user").hasRole("USER")
                .antMatchers("/manager").hasRole("MANAGER")
                .antMatchers("/admin").hasRole("ADMIN")
                .anyRequest().authenticated()
            .and()
                .formLogin()
                .loginPage("/login")                    // controller mapping
                .loginProcessingUrl("/login_proc")      // th:action="@{/login_proc}"
                .defaultSuccessUrl("/")
                .permitAll();
    }
부분입니다.
.formLogin()을 이용하였고, .loginPage("GetMappingUrl") 을 넣게 되면, Mvc 구조에 의해 커스터마이징 페이지를 만들 수 있게 됩니다.
- .loginProcessingUrl("actionMapping")을 넣어 액션 태그를 지정해야 하고
- .defaultSuccessUrl("GetMappingUrl")을 넣어 로그인 성공 시, 어디로 이동할지 지정해줍니다.
- .permitAll()을 지정해주어, 로그인 자체는 인증 없이 누구나 접속 가능하도록 만들어줍니다.
LoginController.java
- 위 매핑된 url을 만들어줍니다.
package com.example.springsecurity.controller;

import org.springframework.stereotype.Controller;
import org.springframework.web.bind.annotation.GetMapping;

@Controller
public class LoginController {

    @GetMapping("/login")
    public String login(){
        return "user/login/login";
    }
}
login.html
<!DOCTYPE html>
<html xmlns:th="http://www.thymeleaf.org">
<head th:replace="fragments/header :: header" />
<body>
<div class="container">
    <div th:replace="fragments/bodyHeader :: bodyHeader"/>
    <h1>로그인</h1>
    <form th:action="@{/login_proc}" method="post">
        <div class="form-group">
            <label th:for="username">이메일</label>
            <input type="text" name="username" class="form-control" placeholder="이메일 입력해주세요">
        </div>
        <div class="form-group">
            <label th:for="password">비밀번호</label>
            <input type="password" class="form-control" name="password" placeholder="비밀번호">
        </div>
        <button type="submit" class="btn btn-primary">Submit</button>
    </form>
    <br/>
    <div th:replace="fragments/footer :: footer"></div>
</div>
</body>
</html>
- 특별히 어려운 내용은 없습니다. action의 login_proc 부분이 SecurityConfig의 .loginProcessingUrl()과 매핑되어있는 것에 유의하세요.
- name이 username으로 매핑되어있지만, SecurityConfig에서 .usernameParameter("")로 커스터마이징 매핑 가능합니다.
- 비밀번호도 .passwordParameter("")로 매핑 가능합니다. 기본값은 username, password입니다.
3. 결론
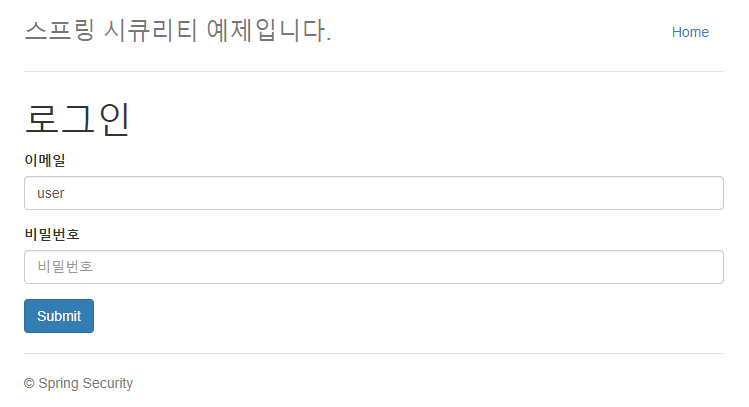
위에 표시된 대로 잘 로그인되는 것을 볼 수 있습니다.
권한을 주었기 때문에 권한별 페이지도 잘 들어가지는 것을 볼 수 있습니다. 자세한 내용은 이 포스팅을 참고하세요.
5. [springboot] Spring Security 간단 권한관리 예제
1. 서론 - 스프링 시큐리티 공부하던 도중 간단하게 권한 부여하는 방법을 예제로 구현해보고자 포스팅하게 되었습니다. - 이 포스팅을 잘 보게 될 경우 간단한 권한관리를 알 수 있게 됩니다. 2.
dkyou.tistory.com
4. 마무리
- 이상으로 로그인 커스터마이징 방법에 대해 알아보았습니다.
'Dev > SpringBoot' 카테고리의 다른 글
| 11. [springboot] 스프링부트 로그인 성공 이후 처리 (0) | 2020.06.12 |
|---|---|
| 10. [springboot] 스프링부트 간단한 로그인/로그아웃 예제 (1) | 2020.06.11 |
| 8. [springboot] Spring Security 간단 권한관리 예제 - AuthenticationProvider 방식 (1) | 2020.06.09 |
| 7. [springboot] Spring Security 간단 권한관리 예제 - UserDetailsService 방식 (1) | 2020.06.09 |
| 6. [springboot] Spring boot 기초 회원가입 예제 (5) | 2020.06.09 |