1. 서론
- 이번 포스팅에서는 로그인 이후 화면에서 보이는 것 수정 및, 로그아웃에 대해 포스팅해보려고 합니다.
간단한 로그인 구현예제는 아래 포스팅에서 확인하시면 됩니다.
9. [springboot] 간단 커스텀 로그인 예제
1. 서론 - 오늘은 스프링 시큐리티에서 제공해주는 form방식 로그인이 아닌, 내 손으로 직접 꾸미는 로그인을 만들어보도록 하겠습니다. - 이 글을 이해하면, 커스텀 로그인 화면을 구성할 수 있게
dkyou.tistory.com
- 이 포스팅을 이해하면, 간단 로그인, 로그아웃, 그에 따른 화면 구성까지 할 수 있습니다.
2. 본론
- 프론트에서 먼저 작업해줍니다. thymeleaf설정을 이해해야 합니다
- sec:authroize의 함수 명에 따라서 보이는 것이 다름에 유의합니다.
<!DOCTYPE html>
<html xmlns="http://www.w3.org/1999/xhtml"
xmlns:th="https://www.thymeleaf.org"
xmlns:sec="https://www.thymeleaf.org/thymeleaf-extras-springsecurity5"
xmlns:xsi="http://www.w3.org/2001/XMLSchema-instance"
xsi:schemaLocation="https://www.thymeleaf.org/thymeleaf-extras-springsecurity5 ">
<head>
<title>Spring Security Example</title>
</head>
<body>
<h1>Welcome!</h1>
<p>Click <a th:href="@{/user}">user</a> to see a greeting.</p>
<p>Click <a th:href="@{/manager}">manager</a> to see a greeting.</p>
<p>Click <a th:href="@{/admin}">admin</a> to see a greeting.</p>
<p sec:authorize="isAnonymous()">Click <a th:href="@{/loginUser}">회원가입</a> to see a greeting.</p>
<p sec:authorize="isAnonymous()">Click <a th:href="@{/login}">로그인</a> to see a greeting.</p>
<p sec:authorize="isAuthenticated()">Click <a th:href="@{/logout}">로그아웃</a> to see a greeting.</p>
</body>
</html>LoginController.java
- SecurityContextLogoutHandler에서 logout method를 제공해주고 있습니다. 먼저 컨트롤러 부분부터 살펴보겠습니다.
package com.example.springsecurity.controller;

import org.springframework.security.core.Authentication;
import org.springframework.security.core.context.SecurityContextHolder;
import org.springframework.security.web.authentication.logout.SecurityContextLogoutHandler;
import org.springframework.stereotype.Controller;
import org.springframework.web.bind.annotation.GetMapping;

import javax.servlet.http.HttpServletRequest;
import javax.servlet.http.HttpServletResponse;

@Controller
public class LoginController {

    @GetMapping("/login")
    public String login(){
        return "user/login/login";
    }

    @GetMapping("/logout")
    public String logout(HttpServletRequest request, HttpServletResponse response){
        Authentication authentication = SecurityContextHolder.getContext().getAuthentication();

        if(authentication != null){
            new SecurityContextLogoutHandler().logout(request,response,authentication);
        }
        return "redirect:/";
    }
}
- 이미 인증된 사용자라면, 로그아웃 처리해주고 root url로 되돌아옵니다.
- 추가적으로, logout함수에 대해 살펴보겠습니다. 아래 코드는 스프링시큐리티에서 구현해준 것입니다.
public void logout(HttpServletRequest request, HttpServletResponse response, Authentication authentication) {
        Assert.notNull(request, "HttpServletRequest required");
        if (this.invalidateHttpSession) {
            HttpSession session = request.getSession(false);
            if (session != null) {
                this.logger.debug("Invalidating session: " + session.getId());
                session.invalidate();
            }
        }

        if (this.clearAuthentication) {
            SecurityContext context = SecurityContextHolder.getContext();
            context.setAuthentication((Authentication)null);
        }

        SecurityContextHolder.clearContext();
    }
- 세션을 없애주고, context.setAuthentication()설정으로 권한을 없애주고, .clearContext()로 설정도 초기화해줍니다.
3. 결론

로그인 하기 전에는 회원가입, 로그인이 다 표시되어있는 것을 볼 수 있습니다.
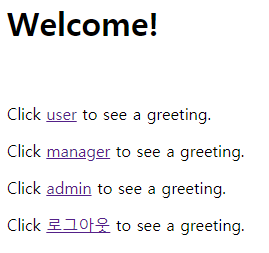
로그인 후에는 회원가입, 로그인 표시 대신 로그아웃 표시만 되어있는 것을 볼 수 있습니다.
4. 마무리
- 이번 포스팅에서는 로그인, 로그아웃 과정에 대해 알아보았습니다.
'Dev > SpringBoot' 카테고리의 다른 글
| 12. [springboot] Spring Boot 로그인 실패 이후 처리 (0) | 2020.06.12 |
|---|---|
| 11. [springboot] 스프링부트 로그인 성공 이후 처리 (0) | 2020.06.12 |
| 9. [springboot] 간단 커스텀 로그인 예제 (2) | 2020.06.11 |
| 8. [springboot] Spring Security 간단 권한관리 예제 - AuthenticationProvider 방식 (1) | 2020.06.09 |
| 7. [springboot] Spring Security 간단 권한관리 예제 - UserDetailsService 방식 (1) | 2020.06.09 |